How to Install And Configure Apache In Ubuntu
Installing Apache
Getting apache onto your Ubuntu machine is easy. Using either the Synaptic Package Manager, Ubuntu SoftwareCenter, search and install the “apache2” module. Alternatively, you can open a terminal and type the following command:
sudo apt-get update
sudo apt-get install apache2
Once the installation finished, open a browser and go to the URL “http://localhost“. If you see the word “It Works!“, then your installation of apache is successful.sudo apt-get update
Configuring Apache
Start, Stop and Restart Apache
After you have installed Apache, it will be added to the init.d list and will auto start whenever you boot up your computer. The following commands allow you to start, restart, stop Apache.
sudo /etc/init.d/apache2 start   #start apache
sudo /etc/init.d/apache2 stop   #stop apache
sudo /etc/init.d/apache2 restart   #restart apache
To prevent Apache from autostart when booting up:
sudo update-rc.d -f apache2 remove
To restore Apache back to the autostart list:
sudo update-rc.d apache2 defaults
Note: the above commands will work in debian-based distro (including Ubuntu) only.
Changing the default localhost folder
By default, apache will operate on the “/var/www” folder. This means that whatever files you place in this /var/www folder will be visible from the URL http://localhost. In some instances, you may want the “localhost” to point to another folder instead, say /home/user/public_html. Here is how you do it:
First, make sure the /home/damien/public_html folder exists. Create a simple html file, name it index.html and place it in the public_html folder.
Open a terminal and type:
gksu gedit /etc/apache2/sites-enabled/000-default
Change
DocumentRoot /var/www to DocumentRoot /home/user/public_html.
Change
<Directory /var/www/> to <Directory /home/user/public_html/>.
Save and exit the file.
Restart the apache
sudo /etc/init.d/apache2 restart
Now, in your browser, reload the URL http://localhost. You should see the html file that you have placed in the public_html folder.

Configuring different sites
The above trick allows you to change the default operating folder of apache, however, some of you might not want to override the default settings. An alternative is to create multiple sites and point apache to the active site.
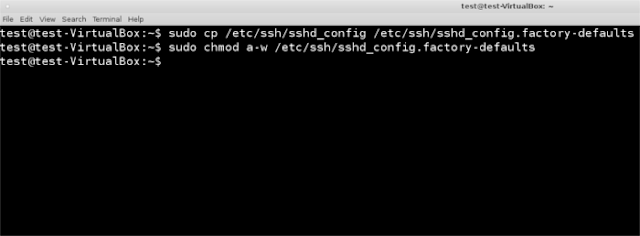
Create a new settings file for your new site.
sudo cp /etc/apache2/sites-available/default /etc/apache2/sites-available/site1
Next, edit this settings file.
gksu gedit /etc/apache2/sites-available/site1
Change
DocumentRoot /var/www to DocumentRoot /home/user/public_html.
Change
<Directory /var/www/> to <Directory /home/user/public_html/>.
Save and exit the file.
Disable the default setting and make active the site1 settings
sudo a2dissite default && sudo a2ensite site1
Lastly, restart the apache.
sudo /etc/init.d/apache2 restart
With this trick, you can create multiple site configuration file, each pointing to a different folder. You can then easily switch between the sites with the a2dissite and a2ensite command
Enabling .htaccess file
.htaccess file is a powerful file that can be used to control and customize a site server behavior without editing the core Apache module. By default, the .htaccess functionality is turned off and all instances of .htaccess files are completely ignored. The server will not even attempt to read .htaccess files in the filesystem.
To enable .htaccess file, open up the settings file that you have created earlier:
gksu gedit /etc/apache2/sites-available/site1
Scroll down the file until you see the part “
<Directory /home/user/public_html/>“. Underneath that line of code, change AllowOverride None to AllowOverride All.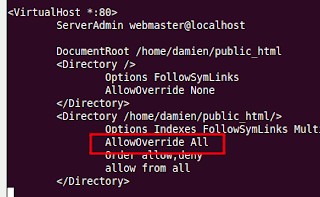
Save and exit the file.